Page 3 of 3: Adding multiple titles/movies to 1 DVD using Nero Recode 2
For compression reasons and playback reasons, I also suggest you use the "Start/End" button (red) to edit out unnecessary video frames (blackness, credits, cast, etc.). Go ahead and click the "Start/End" button, then this screen will pop up. Use the "Fast Forward" (yellow) and "Rewind" (blue) buttons to set which frame is the starting frame (green) and which frame is the ending frame (purple). I recommend you cut out the intro and the credits so that you will use less compression and have better playback quality. You will need to do this for each title in the compilation! Click the OK button (black) at the bottom when you are finished then click the "Next" button (light blue). (Screen Shot Below)

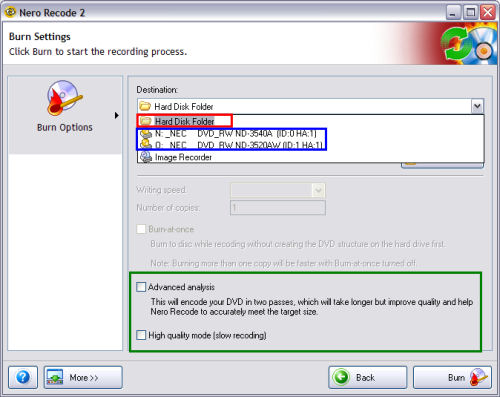
After clicking the "Next" button, you will be presented with this screen. Here you would need to select how you want Nero Recode 2 to output the files. You can pick either "Hard Disk Folder" where Recode would create full DVD structure including .bup, .ifo, and .vob files (red). You also can pick a DVD burner of your choice where Recode would go ahead and burn it for you after it encodes (blue). I highly recommend putting a check mark in both boxes at the bottom, as more than likely you are using heavy compression (green). (Screen Shot Below)
DONE! Enjoy your multi title/movie DVD!
