DVD Backup using Nero Recode 2Original Page URL: https://www.digital-digest.com/articles/nero_recode_backup_page1.htmlAuthor/Publisher: jmet Date Added: Feb 2, 2006 Date Updated: Feb 2, 2006
Nero Recode 2 is a very useful program for shrinking or compressing DVD video streams. If you have used DVD Shrink before, you will notice a great similarity between the two programs. Nero Recode is not only faster but, in most cases provides better results. It is rumored the creator of DVD Shrink got a job at Nero and designed Nero Recode 2. If you like DVD Shrink, then Nero Recode 2 is the program for you.
(Nero Recode only processes unprotected/unencrypted DVDs) Software you will need: When you first start up Nero Recode, it gives you 5 options to choose from. The first 2 is what I will be dealing with in this guide. Perhaps later I will write a guide on how to "Remake a DVD". Since I want to make a DVD, I am going to choose either "Recode an Entire DVD to DVD" (red) or "Recode Main Movie to DVD" (blue). If your worried about the "quality" of your DVD, I highly suggest in just copying the main movie. If you want the menus, extras, etc. I suggest you do the entire DVD to DVD option. Warning, "Recode an Entire DVD to DVD" typically results in using large amount of compression resulting in poor video quality. (I personally always just copy the main movie as I don't care for all the menus and extras. Specially when it degrades the video quality if you keep them.) (Screen Shot Below)  After choosing either "Recode Entire DVD to DVD" or "Recode Main Movie to DVD", you will be presented with this screen where you can load your non-encrypted video files. Go ahead and click the "Import DVD" button (red) and select the folder with your non-encrypted files (usually a VIDEO_TS folder) (blue). (Screen Shot Below) 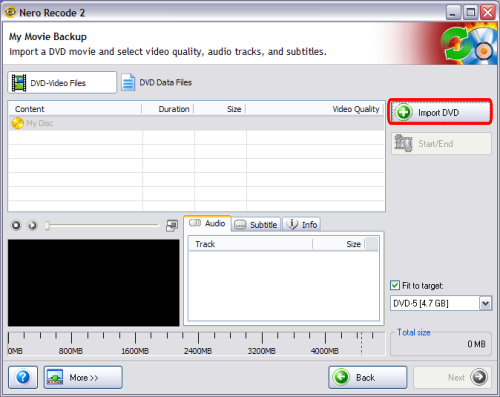 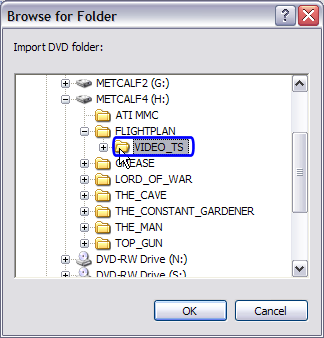
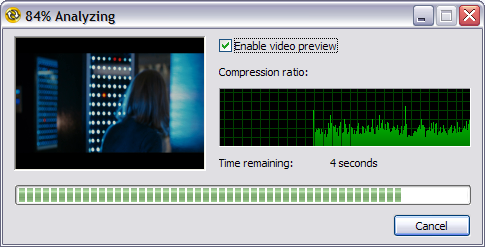
After selecting the VIDEO_TS folder of your choice, Nero Recode will do a quick analysis of the video files to gather the compression that it needs to apply for it to fit on your destination media if any compression is necessary. (Screen Shot Below)
 After it finishes with the quick analysis it will present with this screen showing you the compression its going to use (In my screen shot it says "100.0%", that means its not going to use any compression, which is great! (red) Depending on the bitrate of the video, anything below 70% is below acceptable video quality). On that screen, it will also list all of the audio streams available (blue). You can select/de-select the ones you want and don't want. I only want Dolby Digital 5.1-ch English, so I de-select all others. Dolby Digital 5.1-ch English is 99.9% what you want to have main movie dialog. Dolby Digital 2-ch is usually the director commentaries or the extras audio. You can safely remove those if you are only doing the main movie only. You can also click the "Subtitle" tab to select/de-select the subtitles you want and don't want. (Screen Shot Below) 
Ok, we are almost finished. Lets just double check a few things. Make sure you put a check mark in the box that says "Fit to target". Make sure your target size is set (where you set the size of destination media) (red). The total size in MB of your current project (blue). (Do not go past the red line or it will be too big to fit) (Screen Shot Below)
 After doing the above, go ahead and click the Next button. Now you will be taken to this screen where you can choose where you want the files to go. It can be either to your Hard Drive/Disk or you can set it to automatically burn to your DVD-RW drive of your choice (red). I personally do all mine to the Hard Drive/Disk and manually burn them with Nero Burning ROM later. For convenience though, you might choose your burner so that it encodes and burns all in one step. If you choose Hard Disk Folder, you will also have to choose a folder on your hard drive so that Nero Recode 2 knows where to save the files (blue). I highly recommend putting a check mark in the "Advanced analysis" box (green). It will improve the video quality! The description of it is below the box. (Screen Shot Below) 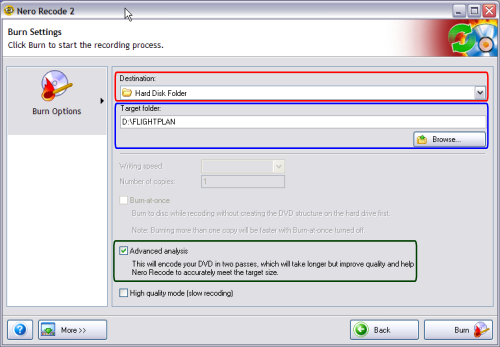
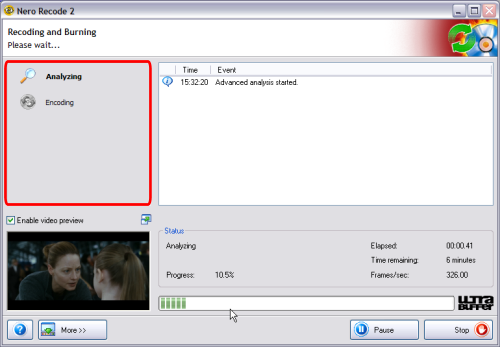
After pressing the Burn button, Nero Recode 2 will now start the process of creating your DVD structure. If you selected "Advanced analysis", it will first analyze the video to improve the overall video quality. If you didn't, it will go straight to encoding the video. On the left hand side, it shows you what stage its doing in BOLD letters (red). The analysis and encoding screen look identical, look on the left hand side to see exactly what stage its doing, cause a common misconception is everyone thinks its starting over. (Screen Shot Below)
 After it completes, this screen will come up letting you know that it has finished. It gives you the option of saving a detailed log/report of the encoding/burning process. Very useful if you run into problems and need assistance and someone ask you if you have the log for them to look at. (Screen Shot Below) 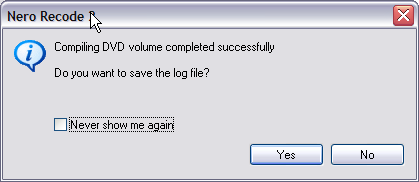 After clicking the Next button on that screen, you have the option to burn the same files to a different blank disc (red) otherwise click Exit to quit Nero Recode 2 (blue). Your DONE! (Screen Shot Below) 
|