DivX to MPEG-1/VCD Conversion Guide
Original Page URL: http://www.divx-digest.com/articles/avi2mpeg1.html
Author/Publisher: Digital Digest
Date Added: Jun 27, 2001
Date Updated: Jun 27, 2001
Ever wanted to convert that DivX movie you have back to MPEG-1, so you can burn a VCD - well, below is a guide on how to do this. The new Nero method is the easiest, the quality is not guaranteed. The new TMPGEnc method is more fool-proof, but takes longer. The Old method is obsolete, but here only for archive purposes. Please choose a method from below :
New Method with Nero Burning ROM 5.5
New Method with TMPGEnc
Old Method
New Method with Nero Burning ROM 5.5 :
Nero Burning ROM 5.5 now includes a built in AVI to MPEG-1/VCD converter. All you need to do is :
- Download Nero Burning ROM 5.5 from the official site
- You'll have to first find out whether your AVI/DivX file is PAL or NTSC. Right click on your AVI/DivX file, select "properties" and go to the "detailed" section. In the "Video Format" section, it should say something like
576 x 304, 24 Bits, 3460 Frames, 23.976 Frames/Sec, 127 KB/Sec, DIVXMPG4 V3
the "23.976 Frames/Sec" is the frames per second property of your AVI/DivX file. 23.976 == NTSC Film ; 25 == PAL ; 29.97 == NTSC.
- Put a new blank CD-R in your CD-writer drive
- Start Nero Burning ROM 5.5 and start a new "VideoCD" compilation. Now you'll need to choose PAL or NTSC mode, depending on your existing AVI/DivX file. Press the "New" button to start the new compilation.

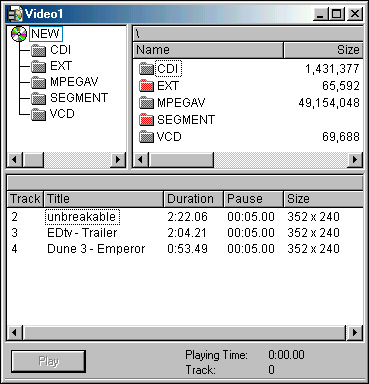
- A new window should open, and you should drag in your AVI/DivX file into the following window :
- Once you have finished dragging in your videos (you can drag in about 70 minutes of video per 650 MB CD), from the "File" menu, select "Write CD". Feel free to change some of the CD writing options (such as Lable, writing speed ...), and click on the "Write" button when you are finished.
Old Method :
Start by downloading and installing the following software :
1. Sorting out the audio :
Most DivX movies come with MP3 or WMA audio compression. Unfortunately, most of the AVI to MPEG-1 conversion tools do not support compressed audio, so the only way to convert DivX to MPEG-1 with audio is to decompress the audio first.
You can do this using VirtualDub - there are two methods :
Decompress audio within the AVI file
1. Load your DivX/AVI file into VirtualDUB.
2. From the "Video" menu, select "Direct Stream Copy".
3. From the "Audio" menu, select "Full Processing Mode".
4. From the "Audio" menu, select "Compression" and choose "No Compression (PCM)".
5. Save the AVI file - your new AVI file should have non-compressed audio. The problem with this is that the AVI file can get really big, and may exceed the 2 GB AVI file size barrier - in this case, you should extract the audio of the AVI file to a WAV file instead (see below).
Extract the audio of the AVI file to a WAV file
1. Load your DivX/AVI file into VirtualDub.
2. From the "Audio" menu, select "Full Processing Mode".
3. From the "Audio" menu, select "Compression" and choose "No Compression (PCM)".
4. From the "File" menu, select "Save WAV".
2. Convert the video :
Once you have an AVI with an uncompressed audio, you'll need to use XingMPEG Encoder to compress the video to MPEG-1
- Start XingMPEG Encoder and select to open a new job.
- There are already many included profiles you can use - if you want to make a VCD compatible MPEG-1 file, please use the profiles under the "VideoCD" section. You should choose either "PAL" or "NTSC" depending on the resolution/framerate of your DivX file - clicking on these profiles will show you the properties of this profile - make sure that it matches as closely as possible to the properties of your DivX file (you can check the properties of your DivX file by right clicking on it and selecting "properties"). After you have selected the correct profile, click the "Next" button
- Change "Stream Type" to "System"
- In the "Video Filename" section, load your original DivX video file
- If you choose the extract the audio of the AVI file to a WAV file, in the "Audio Filename" section, load the uncompressed WAV file you made before. Otherwise, leave this section alone.
- In the "Target Filename" section, choose the location/filename of your final converted MPEG-1 file.
- Click "Finish"
- Your JOB file has now been created - you can press "Encode" at any time to start the encoding. A preview windows on the right will display the video currentl being converted. You can press the "Pause" button at any time to abort the encoding - I suggest you test the conversion by converting a small section first, and then pressing "Pause" to abort the encoding - test the output file to see if it is playable and whether the sound is in sync or not.
3. Cut the MPEG-1 File :
The resulting MPG file may be larger than can be fitted on 1 CD-R, so you will need to cut it. I suggest using iFilmEdit to do this. This program is shareware, and can be used for 30 days before you'll need to register and pay for it. You can download it here :
http://www.digital-digest.com/dvd/downloads/ifilmedit.html
To cut MPG files, all you need to do is to load the MPEG file into this program. In the "footage" window, drag the clip into the "player" window. Go to the "preferences" menu, and change the option to "VideoCD" in the "VideoCD Mode" section. Now use the "mark in" (where the clip starts) and "mark out" (where the clip ends) buttons (bottom left of the Player window) to select the first part of the movie you want to cut (I suggest cutting the first half of the movie) - please take note of the hour:minutes:seconds that your clip ends at. The, go to the "edit" menu and select "record" - the clip you want to cut should now be in the "record" window. Highlight the "record" window and save the clip by going to the "file" menu and selecting "save as". Repeat this for the second half of the movie, making sure you "mark in" at the right spot.
4. Burn the VCD :
Once you have a converted VCD compliant MPEG-1 file, you can use a Video-CD compatible CD-R software to burn a VCD. Now follow the steps in this guide to burn your VCD compliant MPG file as a VideoCD.
|