This Guide will show you how to use VirtualDub as a tool to both add Subtitles to encoders which do not support it, as well as frameserving to encoders which don't support VOB or D2V files. ( * Examples: LSX Encoder / XingMPEG / Panasonic v2.51 * )
NOTE-1: LSX is not a Free Encoder, you CAN replace that step with ANY other encoder you want!
NOTE-2: This Guide is mainly a combination of segments taken from the Complete DVD Backup Guide v2.6!
Copying - CladDVD XP
FrameServing - VirtualDub
Encoding - LSX Encoder and splitting using: TMPGEnc / Plus
Chapters - Chapter-X-Tractor
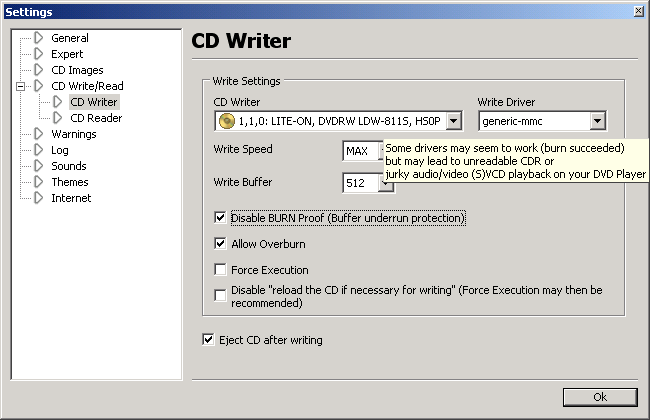
Authoring - VCDEasy ( & ASPI Layer for your system! - use the search for "WinASPI" or scrool to the bottom of the page!)
Before we start with the guide, we must make sure the tools we
are
going to use actually work and setup correctly! Unzip the tools
you are going to be working with into the SAME folder, and
once you do, make sure all applications work, and then we are
ready to begin! For this example i've used "Superman - The Movie
Special Edition" (NTSC/154min/DD51@384k) and we will be converting it
to a Video-CD NTSC Standard so it will fit on two 80min CDR
media. (or 74min with 2min Overburning, which is only if your CDRW
drive and media supports it!), do remember that 740mb filesize
will fit into 74min CDR and 800mb Filesize will fit into a 80min CDR
(in VCD 1min = 10mb!).
NOTE:
This current guide support Subtitles using the VobSub filter for
VirtualDub, there are many other ways as well, but this is what will be
used here, if you want to use other type of subtitles in your movie I
suggest you use one of the other great guides on VideoHelp!
This guide will be divided into the following sections:
Part 1 - CopyingPart 2 - FrameServing
Part 3 - Encoding
Part 4 - Splitting
Part 5 - Chapters
Part 6 - Authoring
Part 7 - Burning
Part 8 - Troubleshooting
(* NOTE: This section of the guide was done with the great help from kwag who has taken the time to do the images for me and explained each step of them *)
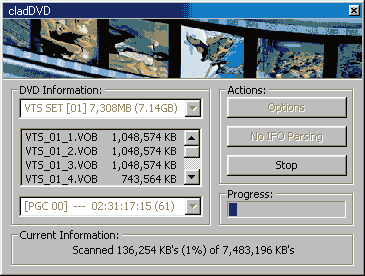
Step 1 - Place your DVD movie in your drive ( DVD drive, NOT a CD drive!) and select a Source Drive and also a Target Location where the files will be copied to.
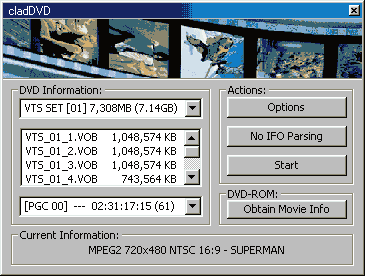
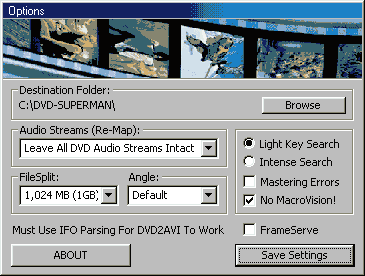
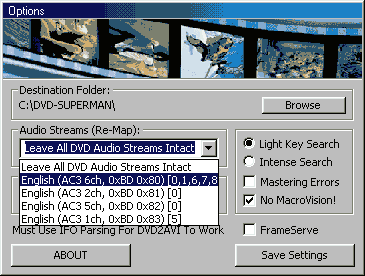
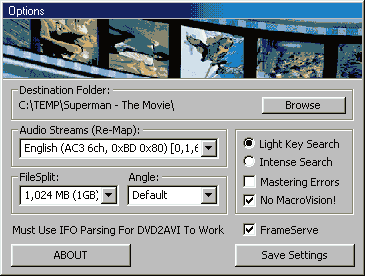
Step 2 - Press the "Options" button, select the pulldown from the "Audio Streams (Re-Map)" to select an Audio Track.
Step
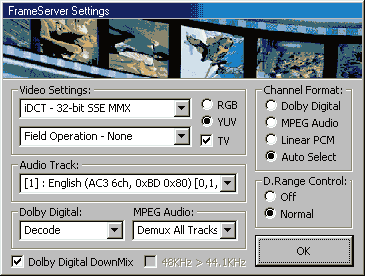
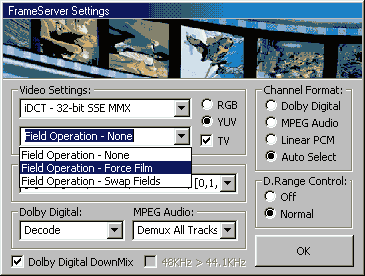
3 - CladDVD XP also supports creating a D2V compatible FrameServing
file, to do so, Press on the "FrameServe" button, and here you
can set to use the quality of your movie under the "Video Settings"
and also if you want to use the "Force Film" to create a NTSC
Film 23.976 format for FrameServing.
Step 4 - After you pressed the "OK" button, press " Save Settings" and you'll be back at the main screen, and you can press the "Start" to begin the copying progress.
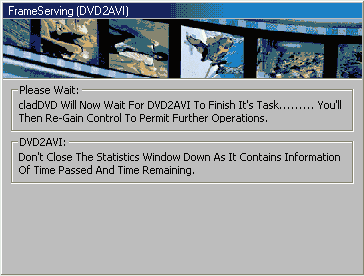
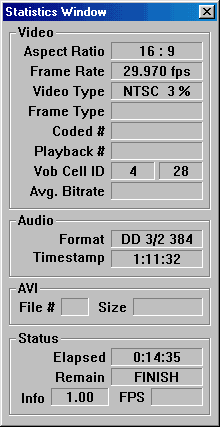
Step 5 - If you have selected to use the build-in " FrameServe" option, then when copying is done, it will automaticly invoke the internal DVD2AVI generator, which will open the "Statistics Window ", don't close it, when it's done, you are finished both copying and frameserving your movie.
It makes it possible for an encoder (old or new) to encode the movie from the VOB files with the addition of selected filters, that it would not be capable of doing otherwise.
Pre-Step A
Pre-Step B
a)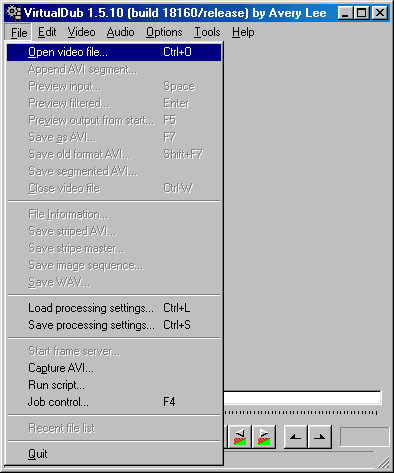 b)
b)

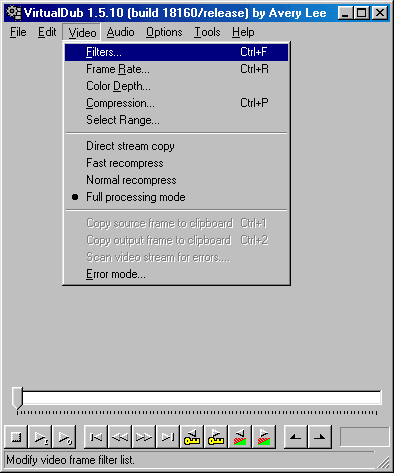
Step 1d - To add "Filters" such as Subtitles, Click on "Video" and select "Filters" if you want to add the VobSub filter.
Step 1e) - In the Filters menu, click on the "Add..." button.
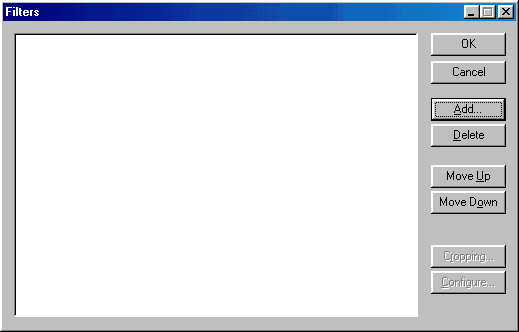
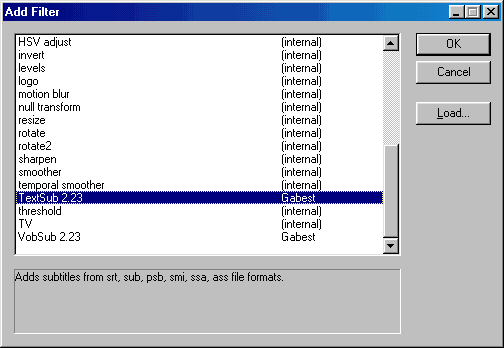
Step 1f) - In the "Add Filter" selection, if your VobSub is not there, click on the "Load..." button.

Step 1g) - Use the "Load external filter" to locate and open the "textsub.vdf" file.
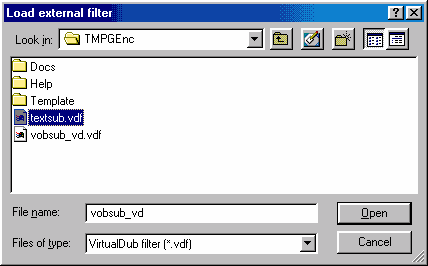
Step 1h) - After you have loaded the TextSub filter, Click on it, and press the "OK" button
NOTE: Click Here to Configure the TextSub Filter for Subtitles in your Movie!
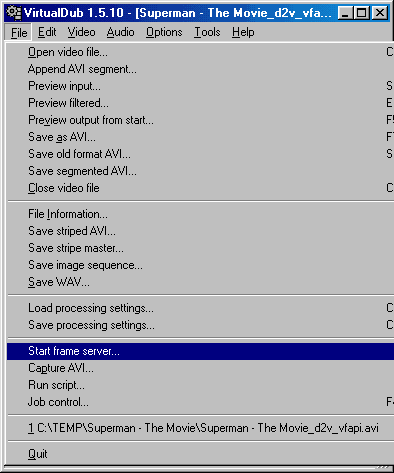
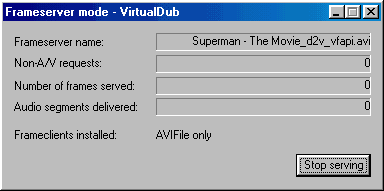
Step 2(a/b) - Click on the "File" menu and then click on "Start frame server..." and when you get the "Frameserver setup" click on "Start"
 b)
b) 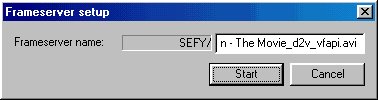
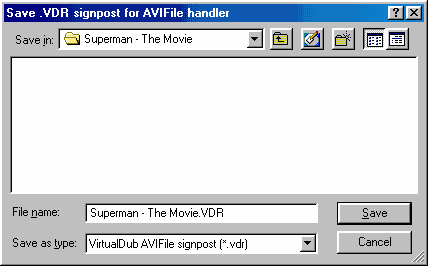
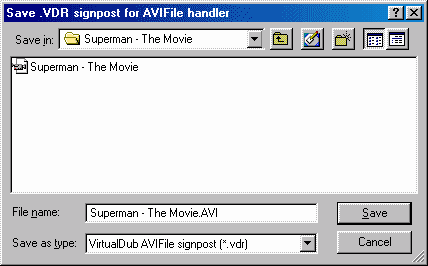
Step 2(c/d) - After you clicked on the "Start" button, you will be asked to save the new frameserved file, make sure you add .VDR at the end of the file, as it is NOT being added automaticly. This will make VirtualDub ready to serve, when you are done with encoding, press on the "Stop serving" button.
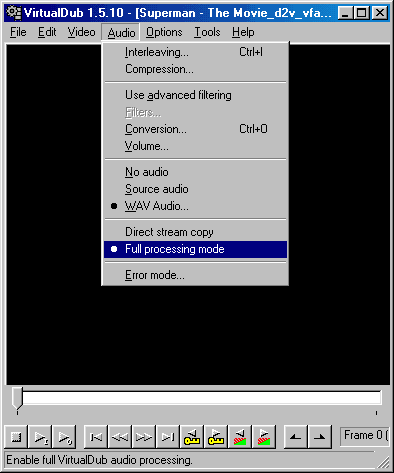
Step 1 - Since LSX MPEG Encoder v3.5 only supports one input,
i'm using DVD2AVI/VFAPI and VirtualDub
for framserving, i've enabled the Video and i've also enabled the "WAV
Audio" and selected the WAV file that was generated by DVD2AVI earlier so both the Video and Audio
will be frameserved into LSX, and i've created a "fake" AVI file
instead of VDR as used in Step 4c on VirtualDub.
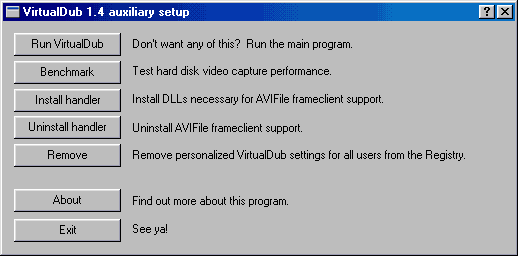
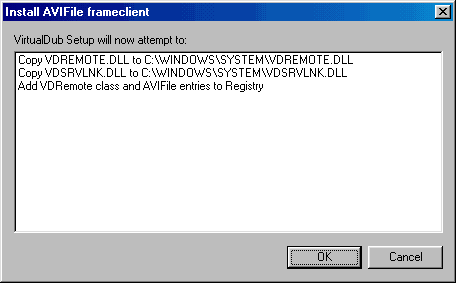
NOTE: Do NOT use the Install Handler as shown on the Pre-Steps on
the VirtualDub section!
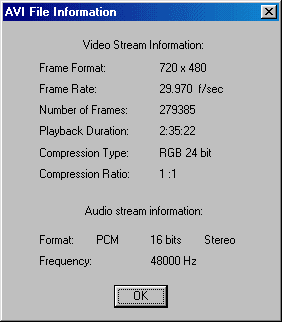
Step 2 - When opening the "fake" AVI generated by VirtualDub, LSX will give you the following
information.
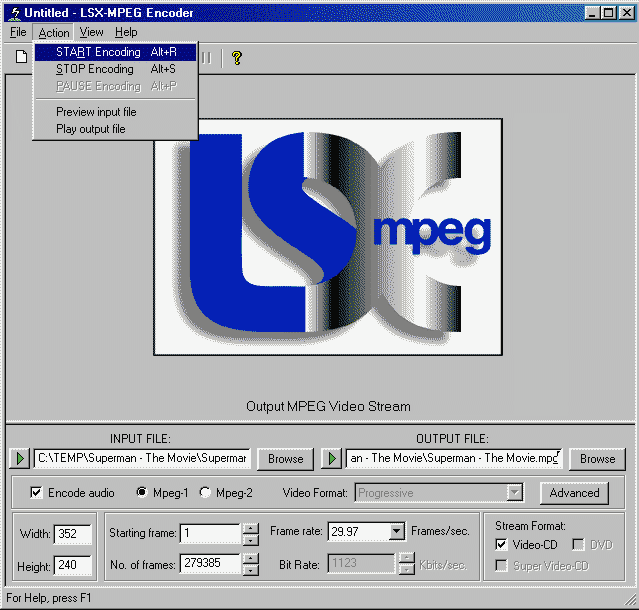
Step 3 - An "Output File" will automaticly be selected,
you can of course change the default name, in the "Stream Format"
you can select the type of encoding you want, supported are "Video-CD
", "Super Video-CD" and "DVD", for this example i've used
the regular "Video-CD" Standard.

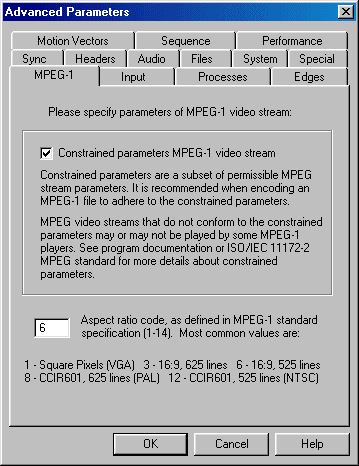
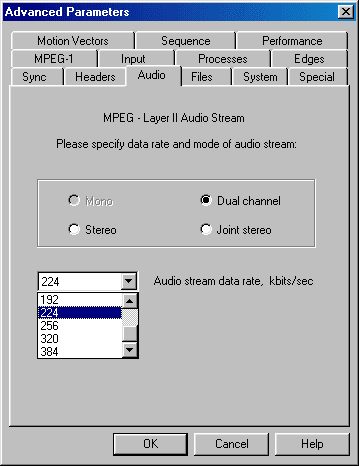
Step 4 - Pressing on the "Advanced" button will give
you much more control over how to encode the movie, all menu items are
very self-explanatory, so here are just two menus out of them as
examples.
Step 5 - When you are done with the "Advanced" menus,
press the "OK" button, which will bring you back to the main
program, select the "Action" and then the "START Encoding"
or press "Alt-R" to start the encoding process.
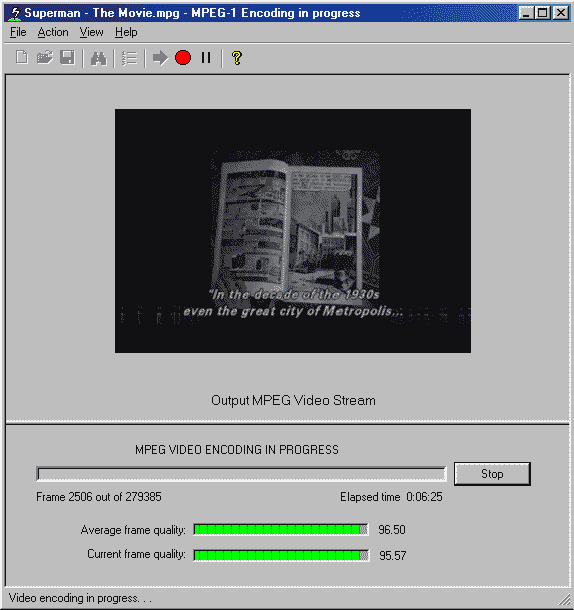
Step 6 - This is how the encoding window will look like, as
you can see, Subtitles exist thanks to VirtualDub
(Steps 2a to 2h).
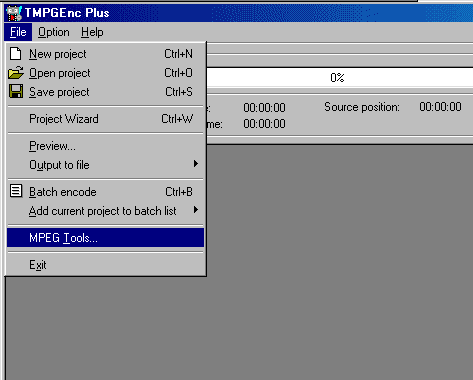
Step 1a - Open TMPGEnc and press "File" and select "MPEG Tools ".
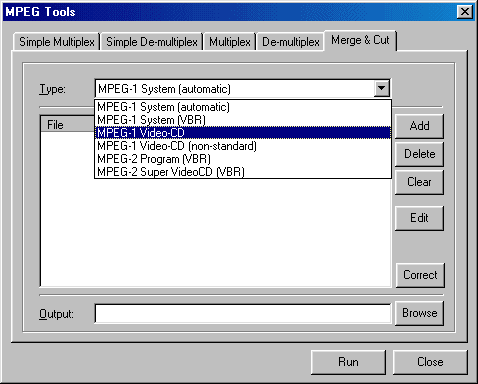


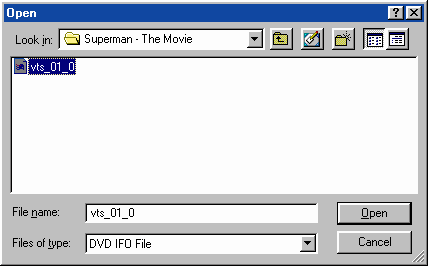
Step 1b - Select the Movie IFO file which you ripped earlier.
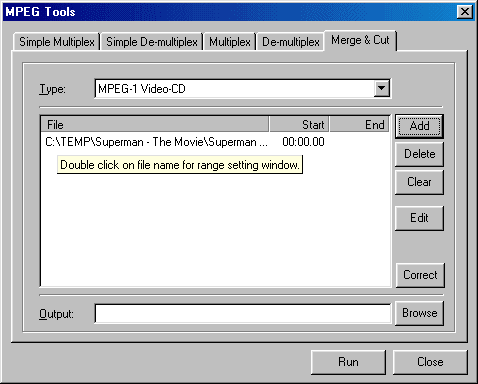
Step 2a - You will now see all the information needed in the " RAW Data" field.
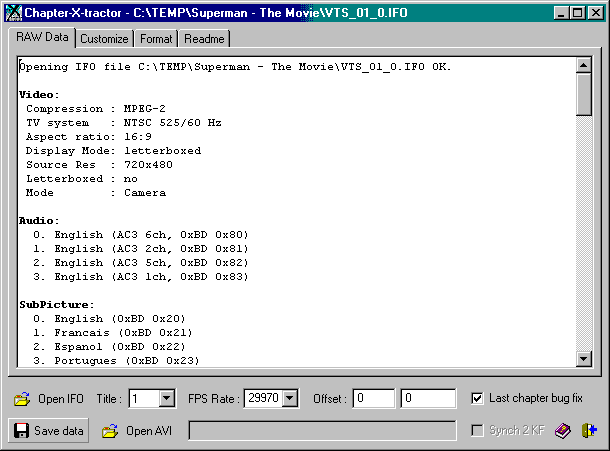
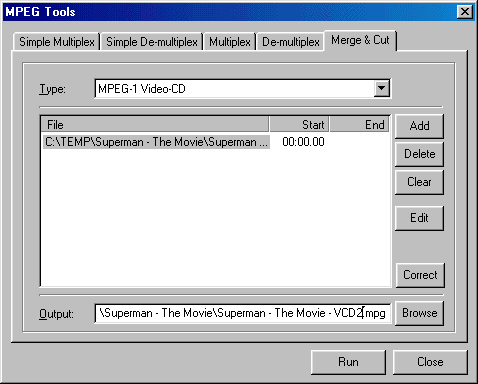
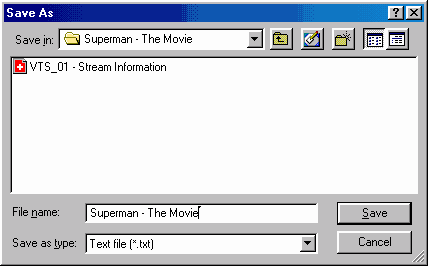
Step 2b - Now Press the "Save data" button, and select a filename for the Chapter Information.
Step
1a
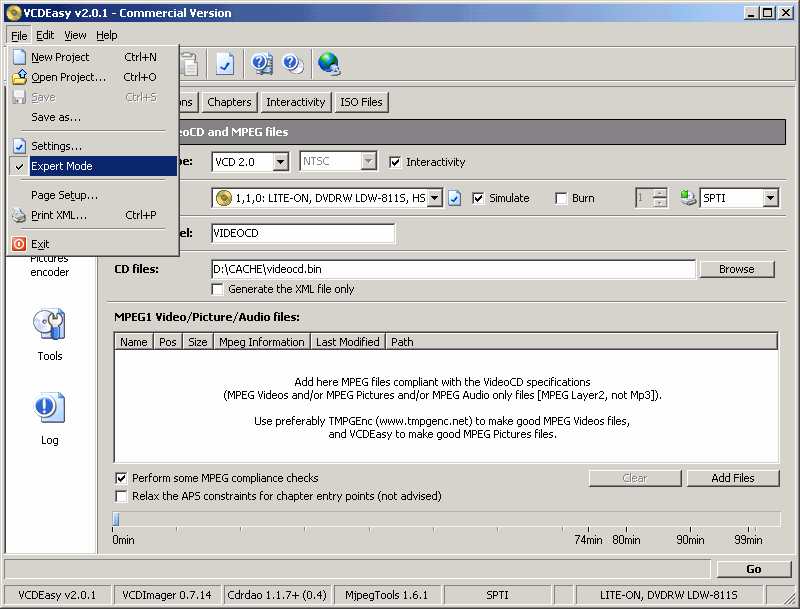
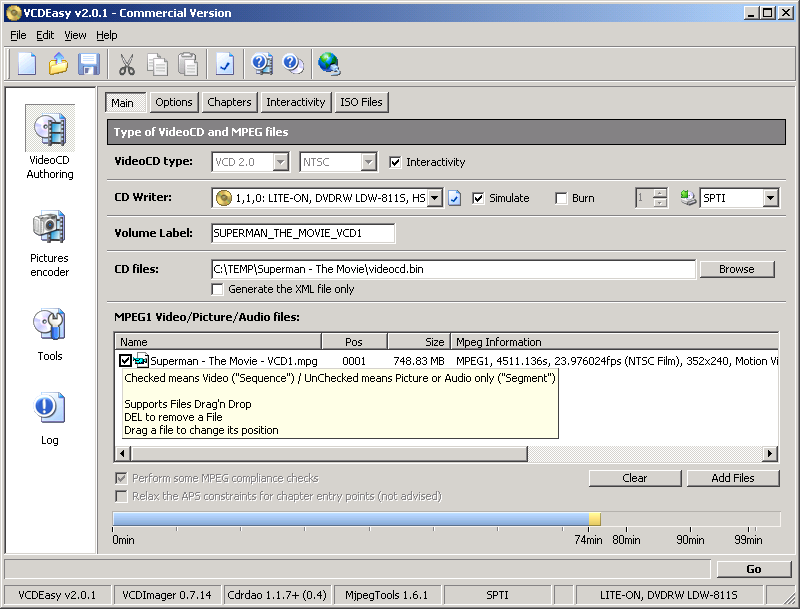
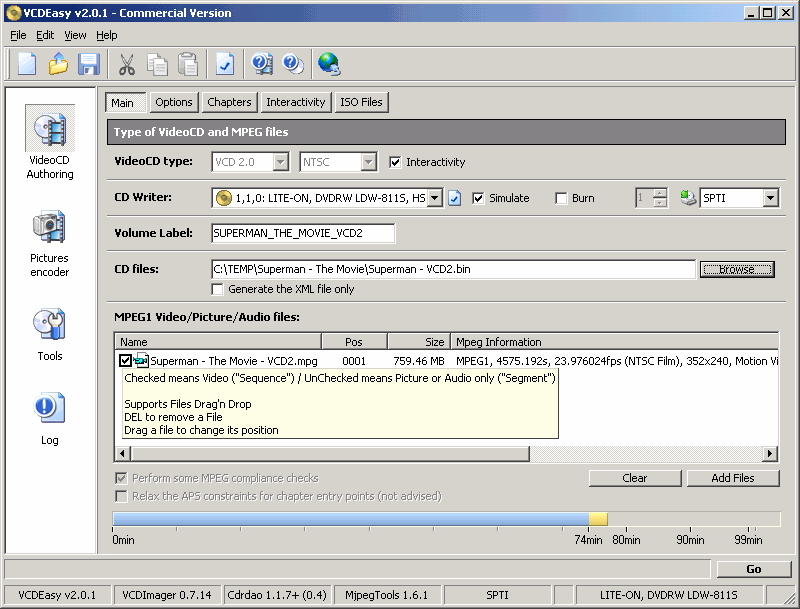
- Open VCDEasy, and set everything according to your specific movie,
and
follow the example below.
( *
NOTE:
Please do not create blank spaces in the Cue/Bin name, as CDRDao may
have a problem burning it later on.*)
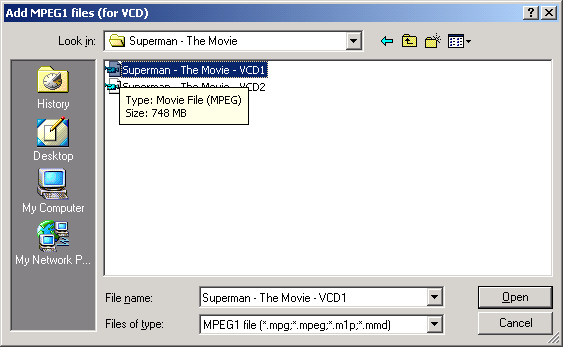
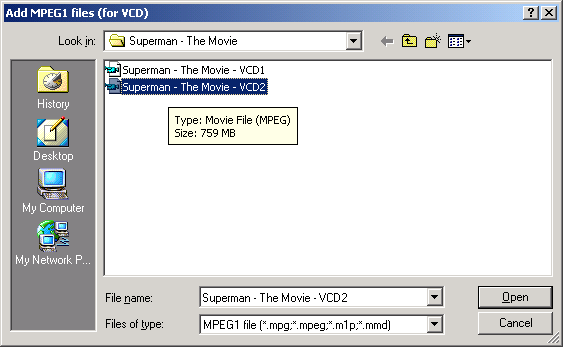
Step 1b - Press the "Add Files" button and select the first of the two files you encoded earlier.
Step 1c - Change the "Volume Label" to reflect the name of the Movie, and also select the "Bin Output File" location.
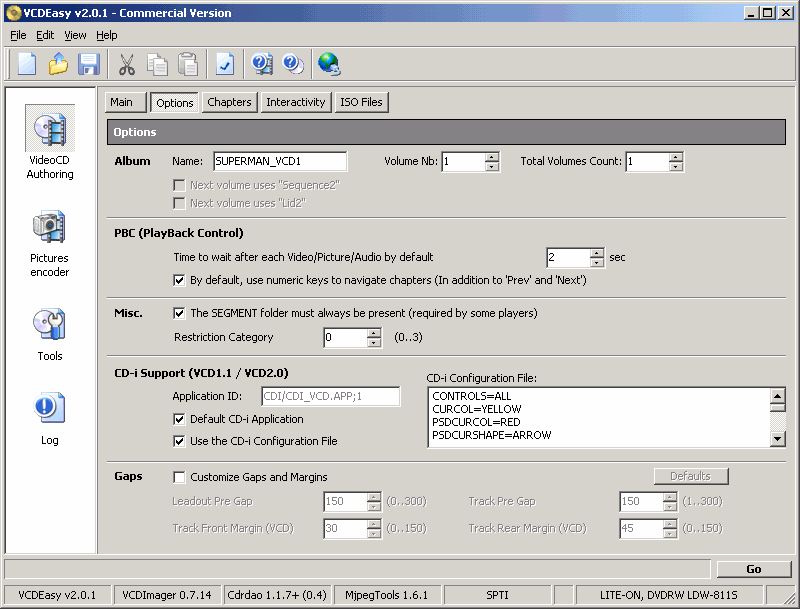
Step 2 - On the "Options" tab you can write down the name of the "Album" and also enable the "Use Playback Control (PBC)".
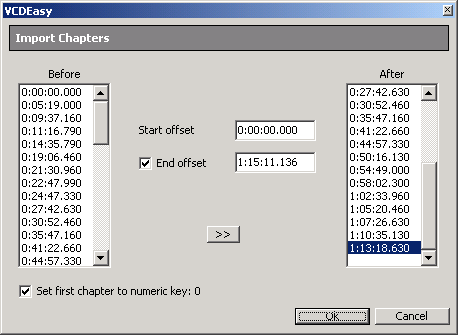
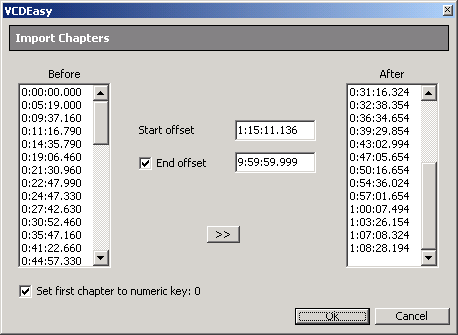
Step 3a - Press the "Chapters" menu item and Here you can select to import the Chapters for your movie, Right Click to get the popup menu so you can import from Smart Ripper or Chapter-X-Tractor.

Step 3b - Select the "Start offset" and "End offset " for the first part of the movie and press the "Ok" button.
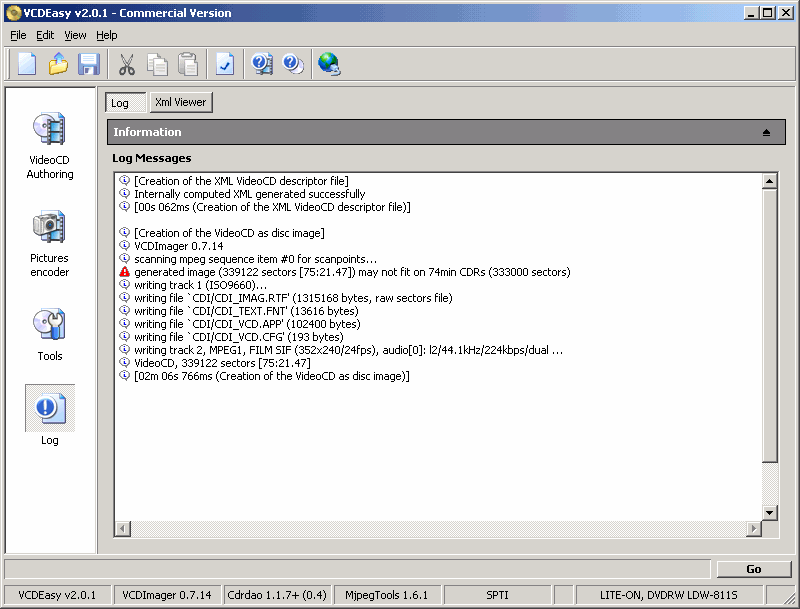
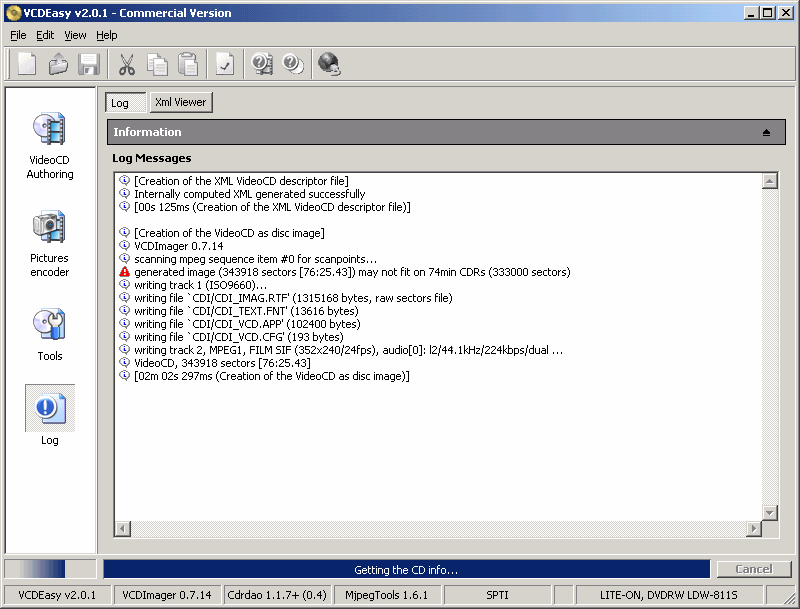
Step 4 - Press the "Go" button, VCDEasy will begin analysing your MPG file and create an Image file for burning.
Step 5b - Change the name of the "Bin Output File", so you don't accidently overwrite the previous file (if you didn't burn it yet).
Step 5c - As in Step 3a and 3b, select the Chapters for the second part of the movie, make sure to start a Chapter after the one you last selected on the previous part (3b), and when you are done press the "Ok" button.
Step 6 - Press the "Go" button again to create
the
second image file of the movie.
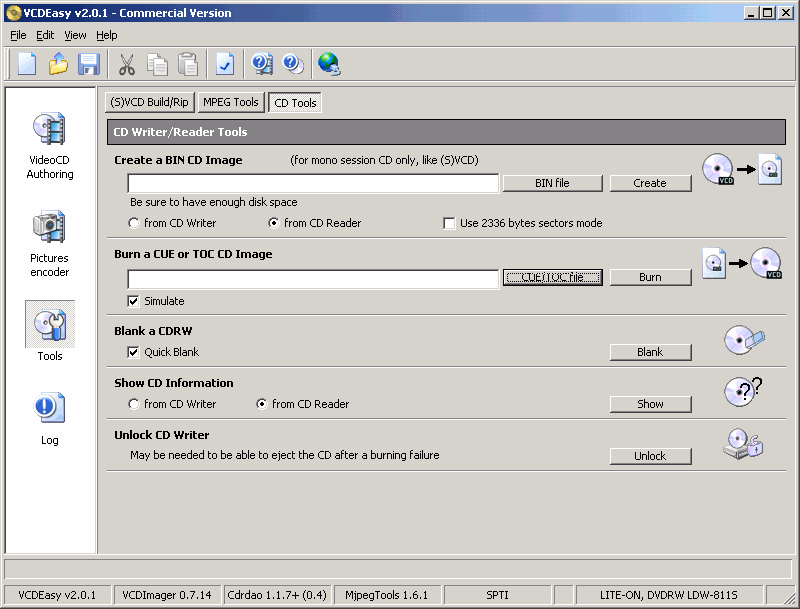
Step 2 - Next, go to the "Tools" section and
select "CDRDao
Tools" from the above menu, here you can "Blank a CDRW " and
also select to "Burn a CUE or TOC CD Image" file, you can also
select to "Simulate" and not actually burn. Press
the " CUE/TOC file" button, and then select the Image you want
to burn.
Step 3a - After you selected the first image of the
movie (in
this case Superman - VCD1.cue) then press the "Burn"
button and the writing of the CD will start.

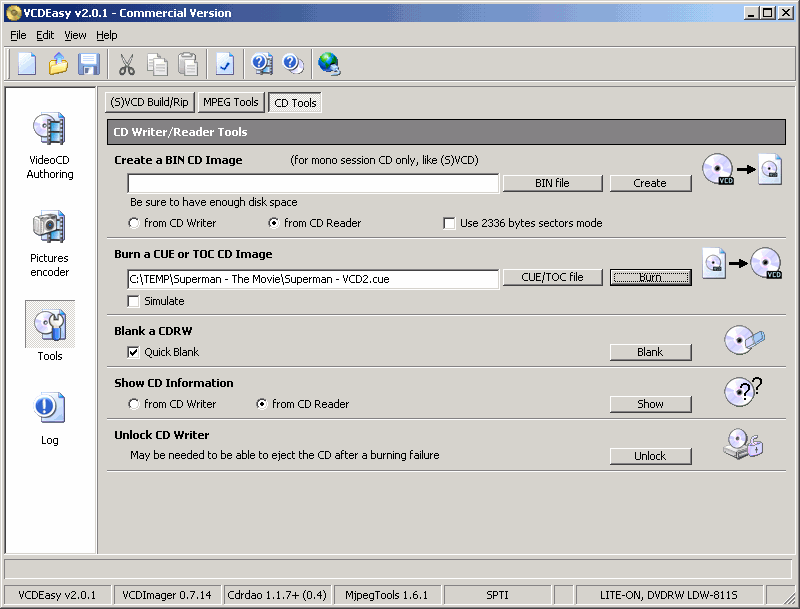
Step 3b - When you are done burning the first part
select the
second image of the movie (in this case Superman - VCD2.cue)
and again press the "Burn" button and the writing of the CD
will start.
- In Order for TMPGEnc to recognise D2V files, you MUST have the VFAPI and the DVD2AVI.VFP file located where the TMPGEnc.EXE file is! it will NOT work any other way! It is also sometimes helps to use the Forced Film option in DVD2AVI, but only if you are still unable to open the D2V files with TMPGEnc. (suggsted by msfox)
- In some DVD movies the Audio Track is located on the second track, so you might want to try in DVD2AVI to rip the secondary Audio Track, if you are not sure which Audio Track to choose, open the Chapter-X-Tractor text file and you can check in there.
- Also in some movies the Audio Track is a DTS and DVD2AVI is incapable of handling it and converting it to WAV, I would recommand you find a diffrent track, there is usually both DTS and AC3 tracks, use the information files by either Smart Ripper or Chapter-X-Tractor to find out if your movie has an AC3 track and if does, then on which track it is, and if there isn't find the next best alternative which would be the 2ch track.
- Make sure when you encode the movie that the currect Template will be used for your movie, an incorrect Template will cause A/V sync! and not to mention the resolution will be distorted (if you use PAL on NTSC and NTSC on PAL).
- If you are having problems copying the Movie VOB files to your HDD, I suggest you check your ASPI Layer, the ASPI that comes with Windows9x, Millenium are not good for ripping, update them, and Windows2000/XP does not come with an ASPI Layer at all! make sure you download the latest ASPI for your system, you can get the v4.6 for 98/Me/2000XP here! (scrool to the bottom of the page!)
- If Smart Ripper or any other of the DVD Copying programs are unable to access your DVD Movie, try to first play the disc using any Software DVD Player, and then try to run the ripper.
-
Because the Copying program always selects as default the longest
running title of the DVD, it might select the wrong title, So make
sure the VOB's that were copied are indeed the VOB that belong to
the movie itself and not the Extra features (e.g. Pearl Harbor).
Sefy Levy,
Certified Computer Technician.