How to use PgcEdit’s Remapping and Restoring
Functions
by blutach
PgcEdit version 8.0 sees the completion of its very advanced DVD remapping and restoring tools.
You can remap (reorder):
- PGCs (new in 8.0)
- TTNs within a VTS (new in 8.0)
- Titlesets on the DVD
- Title numbers
- VOB-Cell IDs
You can also remove uncalled (unreferenced) PGCs while preserving the structure and navigation of the DVD.
And PgcEdit now enables you easily to restore backups, irrespective of how much you have edited your DVD, whilst preserving structure (see important notes at the end of this guide).
CONTENTS
A. Remapping
D. Reclaiming Space in the VOBs
Important – Things to Watch Out For
You may remap PGCs within a domain (from the Domain menu), TTNs within a VTS Titles domain (from the Title menu), whole titlesets (from the DVD menu) and title numbers (from the Title menu). You can also change the VOB-Cell IDs for any cell from the PGC Editor (this is explained in the help file).
The basic function is the same; just the calling procedure is different. We will illustrate by remapping a PGC.
STEP 1 – First, make sure you have parsed all menu buttons and Buttons Over Video. This is critical in all remapping functions.
Next, position the PGC selector on any PGC in the desired domain and click Domain → Remap PGC (if you wanted to remap title numbers you would click Title → Remap Title numbers and if you were remapping titlesets, you would call DVD → Remap Titlesets)
PgcEdit first searches (silently) for occurrences of SPRM 6 or 10 (which might affect the remapping). If it finds no instances of these SPRMs, PgcEdit will display the following:
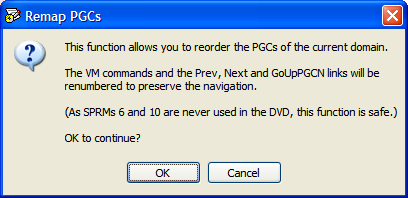
Answer OK to continue.
(In the unlikely event that this function will risk navigation errors, a warning will appear enabling you to easily search for the offending commands and edit them manually, if you wish – in this case, proceed at your own risk).
STEP 2
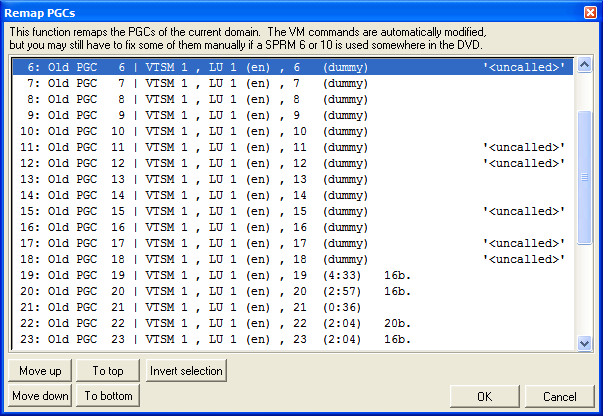
Once you have clicked OK, the following dialogue will appear, showing the remapped and original PGC numbers, their designations, playing time (or dummy), number of buttons, title number (if in the titles domain) and PGC comment (if any).
STEP 3 – In this example, I am going to move all the uncalled PGCs to the bottom. Or, I could select one or more PGCs and move them anywhere I liked by clicking Move up or Move down as many times as necessary.
Ctrl-click to highlight the desired PGCs. If you want to select the majority of PGCs, you can select the ones you don’t want by Ctrl-clicking and then click Invert selection.
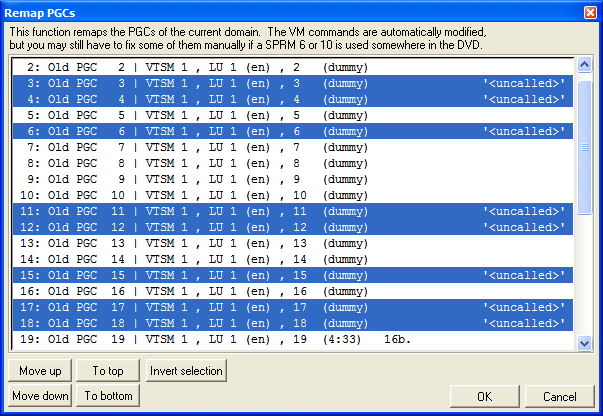
STEP 4 – Click To bottom. You can do other manipulations if you like. When you are finished, click OK (or if you messed up, click Cancel).
PgcEdit fixes all the commands in the DVD, including the button commands which are stored in the menu VOBs. It also ensures the PGC comments are aligned with the correct PGCs. In the status bar, it will tell you what it has done.
![]()
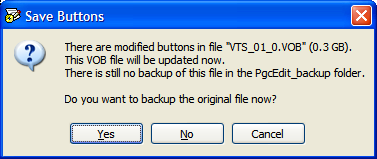
STEP 5 – Ctrl-S to save. If the button commands in a menu VOB have been altered, PgcEdit will save the affected menu VOBs. In addition, if copies of the original menu VOBs are not already in the backup folder, PgcEdit will offer to back them up (it’s very important to answer Yes in case you need to restore things later).
Special note regarding TTN remapping:
If you are remapping PGCs that are TTNs (internal title numbers) of a VTS, an extra step is required

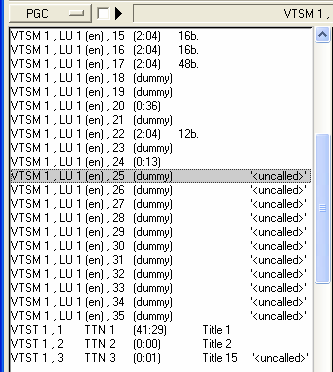
In the above, you can see I have moved the PGCs of the titles domain of VTS 1. TTNs 1 and 3 have swapped places so TTN 3 is now PGC 1 and vice versa. While this is perfectly legal, you may wish to remap the TTNs within the VTS (for example, you will not be able to remove the last PGC in the domain if it is not the last TTN). With PgcEdit, this is simple.
Simply, click Title → Re-order TTNs in domain
PgcEdit does another internal check (this time for SPRM 5) to see if the function is safe (if it isn’t a warning will appear and you can search for, and if necessary fix, the offending commands).
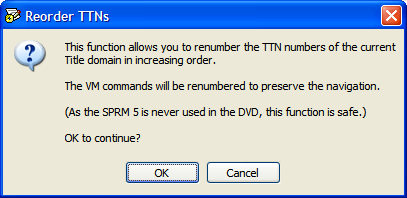
Click OK to re-order the TTNs and Ctrl-S to save your work.
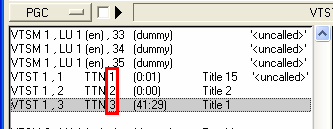
As you see, PGC 1 is now TTN 1 (Title 15) and PGC 3 is now TTN 3 (Title 1).
You can remap the title numbers using the same methodology with the command Title → Remap Title numbers. You might want to do this to remove uncalled titles and since you may only remove the highest title number, it may need to be remapped (see below for an easier method to remove uncalled titles).
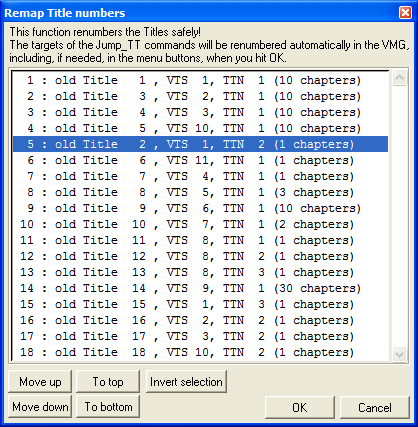
Notice how new title 2 is old title 3 (in VTS 2), while old title 2 (in VTS 1) has been pushed down to be new title 5.
The same procedures apply to remapping VTSs. Call DVD → Remap Titlesets and make your adjustments.
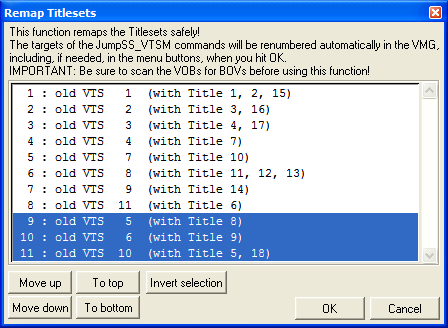
Answer Yes when asked if you wish to make an incremental backup and the VTSs will be remapped.
Note: Be sure to scan for BOVs first, otherwise their commands may not be remapped.
There are 2 ways of doing this.
STEP 1
Call the command DVD → Delete Uncalled PGCs.
STEP 2
If you haven’t scanned for buttons over video (BOV), PgcEdit will display a dialogue asking if you wish to do so. Unless you know for sure there are no BOVs on the DVD, accept the offer to scan now.
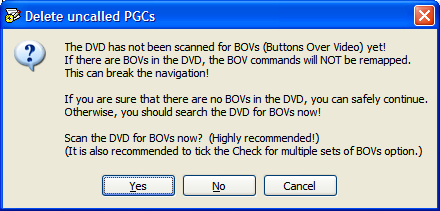
Note: This warning is displayed only once per DVD. If you ignore it, you will need to scan the DVD manually for BOVs to ensure PGCs that are only called by BOVs are not deleted.
STEP 3
Once the BOV scan is complete, PgcEdit will scan the DVD iteratively for PGCs that are never called (either in the PGCs or menu buttons) and highlight them in pink. It will then bring up the following dialogue, which you should read carefully.
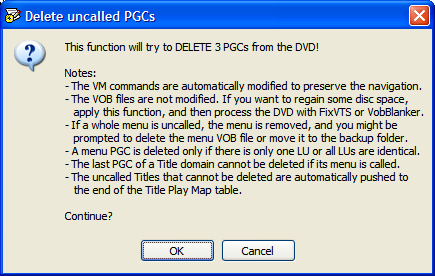
Simply click OK to get rid of all Uncalled PGCs in the DVD. If PgcEdit finds a menu is uncalled, it will delete that too. When removing PGCs, PgcEdit will remap everything correctly, including title numbers and buttons in menu VOBs. As usual, Ctrl-S to save and accept the prompts regarding saving menu VOBs.
When PgcEdit discovers that a whole VTS can be deleted, it will pause on the last PGC and display the following:
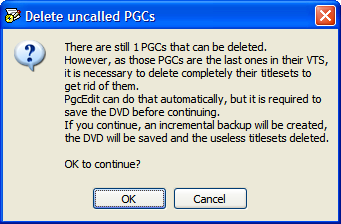
Just answer OK and PgcEdit will automatically:
- Create the required backups;
- Save and reload the DVD;
- If necessary, move the VTS to the end and remap title numbers; and finally,
- Delete the VTS and save the DVD.
All in a couple of clicks!
CAUTION:
This function is an extremely efficient way to tidy up your DVD. However, make sure you have scanned for menu buttons and BOVs or else some PGCs may be identified incorrectly as uncalled and therefore will be deleted! As well, this function might be risky if there are commands which call certain SPRM registers in the DVD. PgcEdit will notify you if this is the case.
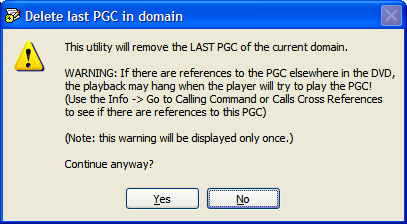
To manually remove a PGC, you can use the command Domain → Delete last PGC in domain (after having remapped your uncalled PGC to be the last one and assuring yourself it is uncalled). However, if it is a title PGC, it must be the highest numbered title in the DVD and the last TTN in the titleset (so you may need to remap the title numbers and reorder the TTNs in the VTS).
Answer Yes and, as usual, Ctrl-S to save when you are finished deleting PGCs.
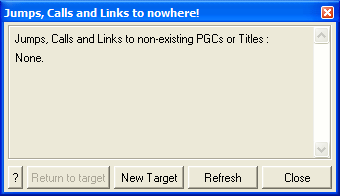
It’s a good idea to ensure your DVD navigation is not broken after these actions. Click Info → Find jumps to nowhere to assure yourself there are no broken links in the DVD. If there are, you should restore your backup (File → Backups → Restore backup) and start again by searching for uncalled PGCs (Info → Find Uncalled PGCs).
Another good thing to do is to fully test your DVD via a Trace to see if it behaves as expected. This is explained in detail in the PgcEdit help file.
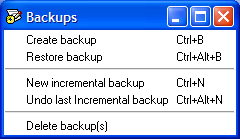
If you realise that you’ve done something you didn’t want to do, or worse, messed something up, PgcEdit has a backup system that can restore you to an earlier state. The easy way to do this is thru the File → Backups menu.
Understanding backups
PgcEdit makes a number of backups – the current one is always called PgcEdit_backup. Other backups in your project folder are older ones and are labelled with a date and time suffix in the following format PgcEdit_backup_yymmdd_hhmmss. The date and time are the last time that folder was modified before renaming.
You can create an Incremental backup manually (File → Backups → New incremental backup) or automatically when you are remapping titlesets. This creates a new PgcEdit_backup based on the current state of the DVD and renames the old backup folder to one with a date and time suffix.
Restore a backup from the File → Backups menu.
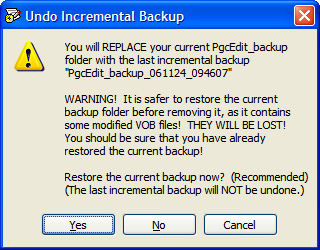
As a rule, it is always better to restore the current backup (File → Backups → Restore Backup) before trying to undo the previous incremental backup. This is because there may be VOBs or other important remapping information in it. However, PgcEdit will determine if it is safe to undo an incremental backup. If so, you will receive this message.
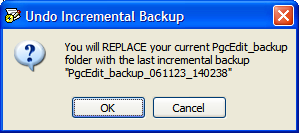
Answering OK will replace the PgcEdit_backup folder with the next most recent backup folder and reload the DVD (don’t forget to parse the menu buttons and BOVs again).
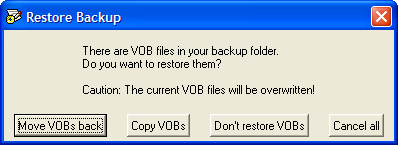
If you try to undo an incremental backup and PgcEdit determines that you shouldn’t because there are VOBs in the latest backup, it will warn you:
If you see this message, it’s best to answer Yes and PgcEdit will automatically restore the (latest) backup – otherwise you will lose important VOB files.
When restoring a backup, select the option to Move VOBs back.
Once the latest backup has been restored, reload the DVD and you can Undo last Incremental backup safely. Undoing an incremental backup will make it the latest backup and rename it back to PgcEdit_backup. If you have many incremental backups, you can continue on in this vein until you are back to where you started, where your only backup folder will be named PgcEdit_backup and you will get this message.

At this point in time, you may only restore the original backup created when you loaded the DVD and you have returned (safely) to the point where you originally loaded the project.
“Alien” Backups
Other programs may make backup folders in your DVD project folder. These include FixVTS, VobBlanker and MenuShrink. Based on the timestamp of these backup folders, PgcEdit will inform you of whether or not you should manually restore one of these backups instead of a PgcEdit backup.
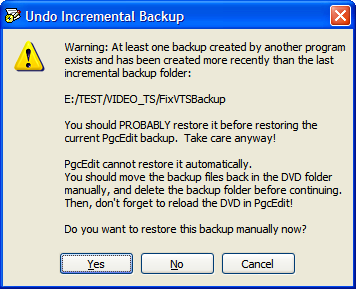
Click Yes and cut and paste all the files in the relevant backup folder (e.g. FixVTSBackup) to the project folder and reload the DVD in PgcEdit (Ctrl-R). If you click No, the other backup will be bypassed, probably resulting in a corrupt project.
Note: Not every program makes multiple backup folders so this process may not yield perfect results. VobBlanker does, and it is recommended that you configure it to do so, and multiple FixVTS backup folders will be created if you launch FixVTS from PgcEdit’s Tools menu. For maximum safety however, we recommend that you run these programs once your editing in PgcEdit is complete (or at least until you have finished making structural changes to your project).
D. Reclaiming Space in the VOBs
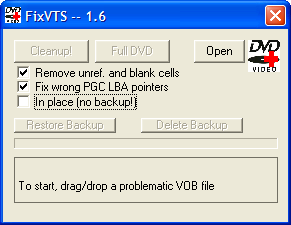
After you have your DVD the way you like it, you can run the DVD project through FixVTS to remove the cells from the VOBs (but note the caution at the bottom of this guide).
After you have saved your project, select Tools → FixVTS and click Full DVD. It’s a good idea to have In place unticked so you can have a backup (this is the default if calling FixVTS from PgcEdit’s Tools menu. As well, if FixVTS is called from the Tools menu, PgcEdit will be able to make multiple FixVTS backup folders).
CAUTION: It is recommended that you use FixVTS or VobBlanker to cleanup the VOBs only when you are entirely comfortable with the final structure of your DVD. This is because these programs alter the VOBs and perhaps you may not have even saved backups of the VOBs. If you do run FixVTS or VobBlanker during the middle of an editing run, save backups of the VOBs and transfer them into the PgcEdit_backup folder.
IMPORTANT - Things to watch out for
- Make incremental backups and backups of menu VOBs when prompted – this is essential for the restoration in case things go wrong.
- When restoring backups, it’s wise to do a “Restore backup” before starting to undo incremental backups.
- There may be a file in an incremental backup folder called remap_vts_info.tcl. Do not delete or modify this file (it is read only), as this will certainly ruin your chances of restoring a backup successfully.
- Before deleting or remapping anything, make sure you have scanned for menu buttons and BOVs (buttons over video) – the default is to scan for these on loading a DVD.
- PgcEdit will warn you if it is potentially risky to remap or delete anything. If this happens, search for and, if necessary, modify the offending commands and then re-call the relevant function.
- It is safest to reclaim space with FixVTS or VobBlanker after editing in PgcEdit has been completed. However, to reduce risk, make sure VobBlanker is configured to make multiple backup folders (see the more settings screen) and have “In place” unticked when running FixVTS (PgcEdit will launch FixVTS this way from its Tools menu).
Questions?
Raise them in Doom9’s IFO/VOB Editors forum or Digital Digest’s Authoring & Editing forum.
Credits
Huge thanks to r0lZ for providing this incredibly powerful free program.
Version 1 - 20 December 2006